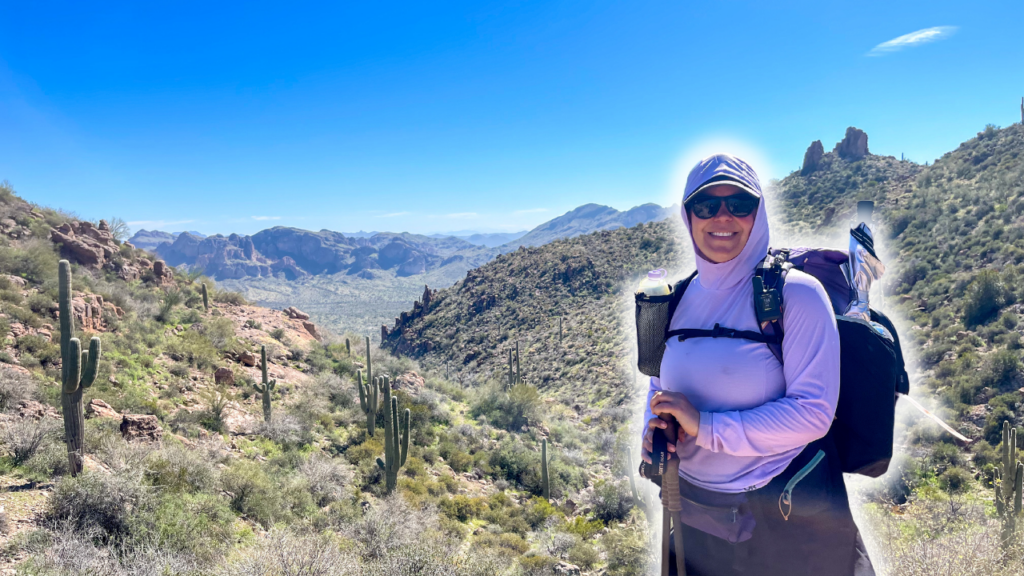
During my recent backpacking trip through the Superstition Mountains with three students from my online backpacking program for women, The Confident Solo Female Backpacker System, I got to try out a couple new pieces of backpacking gear thanks to my friends from Gossamer Gear: ‘The One’ Ultralight Trekking Pole Backpacking Tent, the Lightrek Hiking Umbrella and the Handsfree Umbrella Clamp.
Gossamer Gear is the same small cottage company who makes my beloved backpacking pack, the Mariposa 60 that I’ve been using over the last few years.
The Superstition Mountains or “The Supes” as the locals refer to them are one of the premier hiking and backpacking destinations in the Southwest. The Superstition Mountains are located 1 hour East of Phoenix in Arizona.
Here, we got to experience the beauty of hiking in the high desert landscapes, rugged peaks, cacti and tons of panoramic desert views. This was my first time hiking in the Superstition Wilderness and it was pretty epic. Watch this video to see our 3 day/2 night overnight backpacking trip through The Supes:
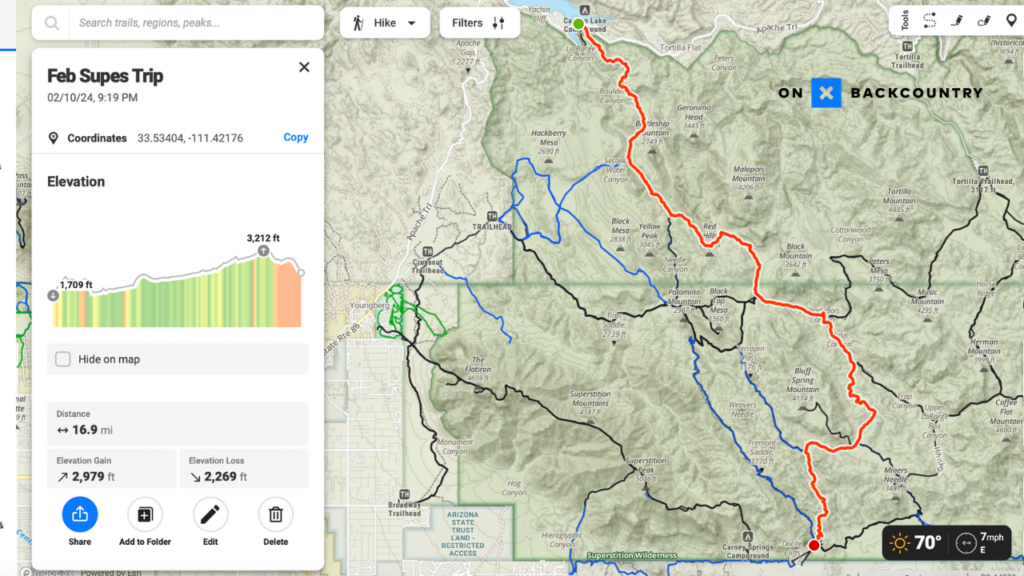
Our route for this trip would be a 17 mile thru-hike, starting from the Boulder Trailhead and for three days and two nights, we’d make our way to the Peralta Trailhead while getting to see all kinds of beautiful viewpoints and landscapes along the way.
For this trip, Gossamer Gear sent me both their ultralight backpacking tent, ‘The One’, the Lightrek Hiking Umbrella and the Handsfree Umbrella Clamp…and I kind of loved ALL of this gear. Here’s why…
Weight
First of all, let’s just start with the weight of The One tent. The One is an ultralight, trekking pole backpacking tent and uses two trekking poles as the structure of the tent instead of needing tent poles. The total weight of this tent with the shelter, stuff sack, stakes and extra cord is 22 ounces, which is a little more than a pound.
Space
The body of the tent and tent floor are made of a lightweight, waterproof nylon material and has factory taped seams. The dimensions of the bathtub floor are 43” long with the head end width being 33” across and the foot end width being 21” across. I’m 5’7 and was able to fit my regular length inflatable sleeping pad with a light pad underneath with no problems. I like to store my pack on the inside of my tent at the foot of my sleeping pad and was able to do that inside this tent easily.
Cost
As we all know, backpacking gear can really expensive, and price might be a consideration for you when shopping for a tent. At the time of this video recording, The One sells for $255 on the Gossamer Gear website. Not too shabby for an ultralight backpacking tent. I spent over $400 on my previous backpacking tent and it was WAY HEAVIER and even broke on me multiple times while using it out in the backcountry.
Single-Walled Tent
The One is considered a 3-season, single walled tent, which means the body of the tent and rain fly are combined into one system. There’s no inner mesh, no outer rain fly and no extra material or tent poles you have to pack and carry.
Depending on how close you’re camping to water, there could be some condensation on the tent, but I’m finding that this is the name of the game for any single walled tent. It’s the small price you pay for the huge weight savings.
Easy Setup
I’ve been using a freestanding tent for years and wanting to make the switch to a trekking pole tent has been kind of intimidating. So I love and appreciate just how easy this tent is to setup.
To set up The One all you need to do is:
- Set your trekking poles to 125 cm
- Layout the ground sheet
- Layout the tent on top of the ground sheet
- Stake out all 4 corners at a 45-degree angle.
- In the front of the tent near the door, insert a trekking pole with the handle at the top and then put the tip into the grommet.
- Then, stake out the front door vestibule.
- You’ll then repeat this on the back side of the tent with the other trekking pole.
- Once you’ve got both trekking poles up and both vestibules staked out, tighten each of the 4 corners.
- You can also give the tent structure a little more stability by attaching each of the trekking poles to the outside of the tent.
- The One comes with 6 stakes, but if you add 4 more, you can use those additional stakes to stake out the bathtub floor for more room inside the tent.
- Then, unpack your pack, set up your sleeping system and you have your home for the night out on trail ready to go!
Tent Tour – The Outside
You’ll notice that the front and back side of The One tent are different. The vestibule in the back of the tent doesn’t go down as far but provides a ton of ventilation. There’s only one door on the front of the tent, which also helps make setting up the tent really easy. You can roll up both sides of the vestibule and allow for even more airflow.
Tent Tour – The Inside
Inside the tent, there’s one interior pocket, which is where I keep my battery pack and headlamp. The inside of the tent has a fully enclosed bathtub floor, which provides plenty of protection from outside dirt, elements and bugs. There’s plenty of head room inside when you sit up, even when sitting on a fully inflated sleeping pad. If you want even more headroom, you can always attach the extra guy lines on the side of the tent and stake them out when setting the tent up.
Tent Tour – The Vestibule
Also, the vestibule is quite spacious. I normally keep my shoes and extra water out in my vestibule, but if you needed to, you’d have plenty of space to use your stove in this covered area if you were caught in a storm.
Lightweight Hiking Umbrella
For this trip, not only did Gossamer Gear hook me up with a new tent, but also sent me their Lightrek Hiking Umbrella and the Handsfree Umbrella Clamp. The umbrella and handsfree clamp were super clutch for hiking in the desert. The umbrella itself is full-size, super light and I can use it handsfree while still being able to use both of my trekking poles while I’m hiking.
This was my first time ever hiking with an umbrella and I now understand what all the hype is about.
Thank you Gossamer Gear for the fabulous gear hook up for this backpacking trip!
Water
One thing we were all kind of worried about on this trip was the water situation since we’d be hiking in the desert. But, thanks to all of the recent rains (we hiked this one in February), there were plenty of water sources along the way and numerous water crossings we had to navigate through along our route. A huge bonus for doing this backpacking trip here in February!
Campsites
Also, there weren’t a whole lot of crowds while we were out here. We pretty much had our pick of the campsites along the way. Campsites are first come, first served. No permits needed. Just make sure you pick a campsite that’s already been camped at before instead of creating a new one.
My final thoughts about The Supes – I love them. This trip was another reminder of why I love desert hiking so much, especially during the winter where its cold and snowy everywhere else.
Thank you again to Gossamer Gear for having me try out all of this new gear for my recent backpacking trip into the Superstition Mountains. I’m super excited and appreciative of Gossamer Gear because they help support me getting to go on some of my epic backpacking adventures.
Disclaimer: The-Hungry-Hiker.com is a participant in the Amazon Affiliate Links and AvantlInks Program, affiliate advertising programs designed to provide a means for sites to earn advertising fees by advertising and linking to Amazon.com and other affiliated sites at no cost to you. Please note, I only link to products and services I personally use and trust.
Thanks for you article. I have a trip to the supes planned in a few weeks and really appreciate your insight. I was thinking about trying out the gossamer gear one. I usually take a down quilt when backpacking. Would that be ok with a single wall tent? I am concerned about the condensation.
Absolutely! I took Gossamer Gear’s The One tent on both of my backpacking trips to the Superstition Mountains last year and it was great. You’ll always run the risk of having condensation with any single walled tent, but once you’re able to get them in the sun, they dry super quickly. Even with condensation on my tent on the second night of my Supes trip, I was just fine. Here’s my backpacking gear list from both of my trips to the Superstion Mountains in 2024: https://lighterpack.com/r/eu7euc
Have fun out there!