Can You Eat for 2 Days on Trail for Just $20? Whether you’re looking for budget-friendly, cheap and easy backpacking meal ideas from the grocery store or are just interested in how you can eat for 2 days on trail for only $20, here’s my $20 Backpacking Meal Plan Challenge where I give myself a $20 budget to put together a meal plan for my upcoming 2-day/2-night backpacking trip.
$20 Backpacking Meal Plan Challenge: Ground Rules
I’m giving myself $20 to cover everything I plan on eating over two days and two nights on trail. This means I’ll need:
- 2 Breakfasts
- 2 Lunches
- 2 Dinners
- Plus, snacks and electrolytes for both days
For this challenge, I want to include foods that are:
- Budget-friendly
- Lightweight
- Calorie-dense
- Easy to pack in a hard-sided bear canister because they’re required where I’ll be backpacking
- Simple to prep because the forecast is calling for cold and wet weather
To shop for my meal plan, I headed to my local Walmart. No, this post isn’t sponsored by Walmart. I chose to shop here because, after comparing prices around town, Walmart consistently offered the most affordable options for nearly everything on my meal plan shopping list.
$20 Backpacking Meal Plan Challenge: BREAKFAST
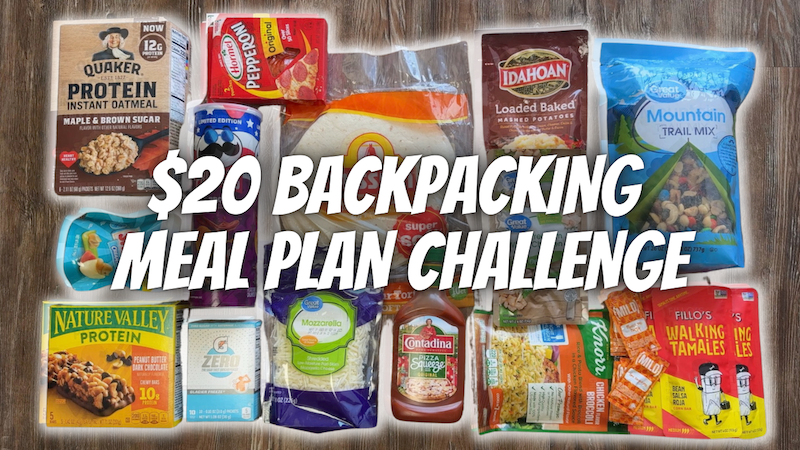
For breakfast, I decided to go with the Protein Maple & Brown Sugar Instant Oatmeal packets and for some extra protein and calories, add in peanut butter.
Fun Fact: Instant oatmeal packets were some of the first things I saw dumped in Hiker Boxes along the Pacific Crest Trail during my thru-hike back in 2018. So, if you aren’t already sick of eating oatmeal out on trail, this can be an easy, cheap and versatile backpacking breakfast option.
One 6-pack box of the Protein Maple & Brown Sugar Instant Oatmeal packets was $3.97, making each packet $0.66. For each breakfast, I used two packets.
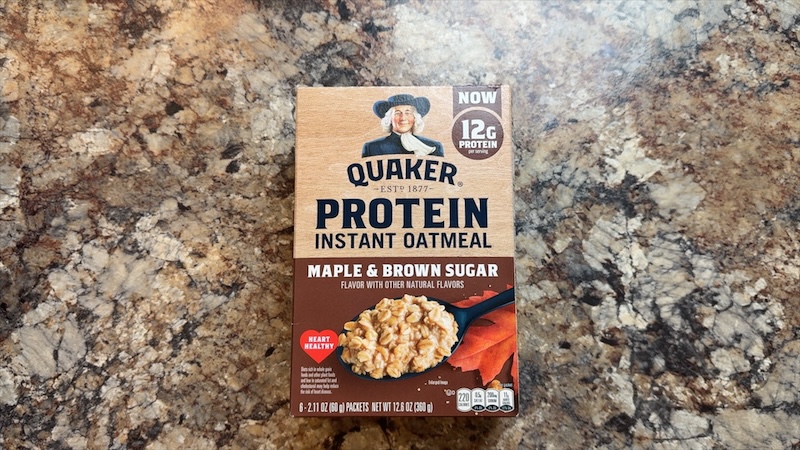
For peanut butter, I chose the 6-ounce squeeze pack of Skippy peanut butter since this would be a really easy way to store peanut butter in my bear can and dispense peanut butter into my oatmeal without a bunch of extra packaging.
One 6-ounce squeeze pack of peanut butter was $1.50, making the 2 tbsp of peanut butter I’d need per breakfast $0.18.
This breakfast option comes out to 630 calories, 32 grams of protein and costs $1.50 per meal.
Even though I’m pretty sick of oatmeal at this point, this breakfast option wasn’t so bad with the added peanut butter, and it was quite filling.
$20 Backpacking Meal Plan Challenge: LUNCH
For lunch, I decided to go for a fun, no-cook option and make Trail Pepperoni Pizza. To make Trail Pepperoni Pizza, I’d need:
- 2 tortillas
- 1 serving of shelf-stable pepperoni
- Pizza sauce
- Mozzarella cheese
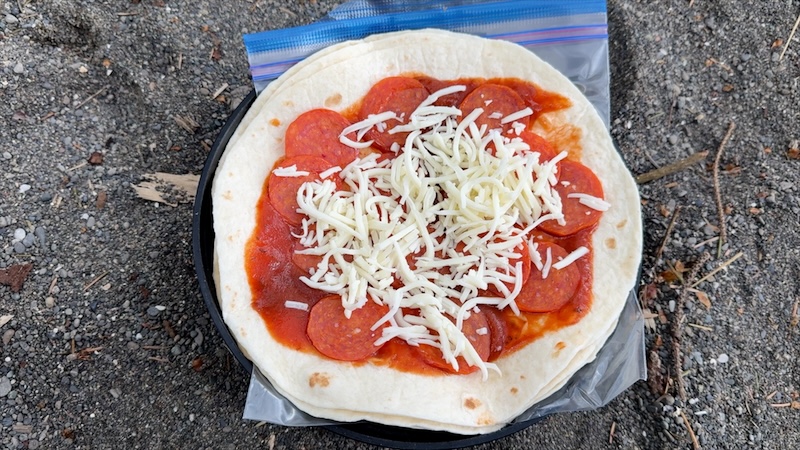
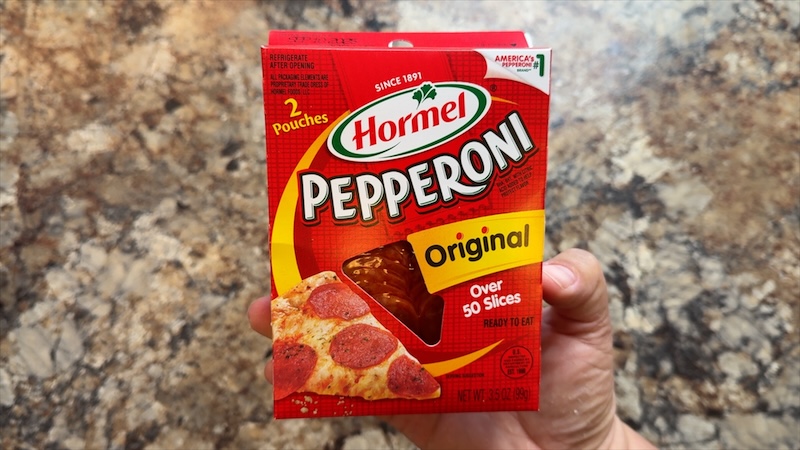
I got an 8-pack of flour tortillas for $2.78, making each tortilla $0.28. I got a box of this shelf-stable pepperoni that doesn’t require refrigeration, making one serving of pepperoni for two pizzas $0.46 per serving.
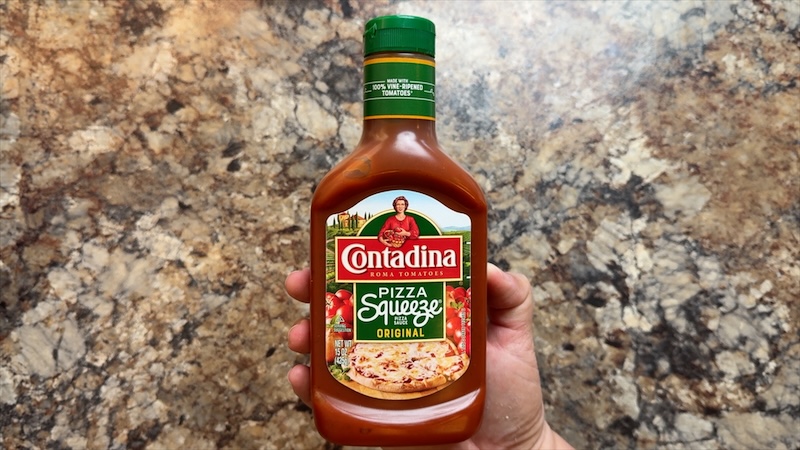
For pizza sauce, I opted for this squeeze bottle, which was $1.98 and just barely fit into my bear canister. I like my pizza saucy, so I used two servings of sauce per pizza, making this one $0.66 per serving.
For cheese, I found the cheapest option was to get a small bag of shredded mozzarella cheese for $2.24. I like my pizza pretty cheesy, so I ended up adding two servings of cheese per pizza making this one $0.50 per serving.
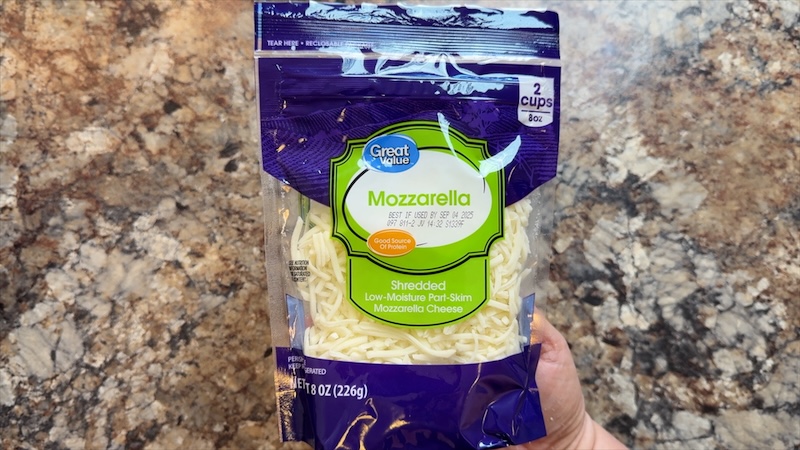
For those of you wondering if it’s okay to bring cheese out on trail without refrigeration the answer is YES! My trip would only be for two days. The weather forecast was calling for cool temps during the day and night and the cheese would be buried inside my bear canister, far away from any direct sunlight.
This fun, no-cook lunch option ended up being my most favorite meal of the entire trip. Not only because it was super easy to make, didn’t require me needing to get out my stove or using fuel to boil water, but also because it was delicious and the perfect amount for a satisfying lunch.
If you have a craving for pizza the next time you’re out on a backpacking trip, Trail Pepperoni Pizza can very easily help satisfy that craving.
This lunch option comes out to 650 calories, 27 grams of protein and costs $2.18 per meal. The serving size for each meal is two trail pizzas.
$20 Backpacking Meal Plan Challenge: SNACKS
Snacks are always hard for me because I never really know what I’ll crave until I’m out on trail and I never know exactly how hungry I’ll be while I’m out there. This is why I’m notorious for always overpacking snacks for any trip I go on.
In an effort to stay within my budget for my $20 Backpacking Meal Plan Challenge, I decided to pack the following snacks with me for my trip:
Snack Option #1: Great Value Mountain Trail Mix
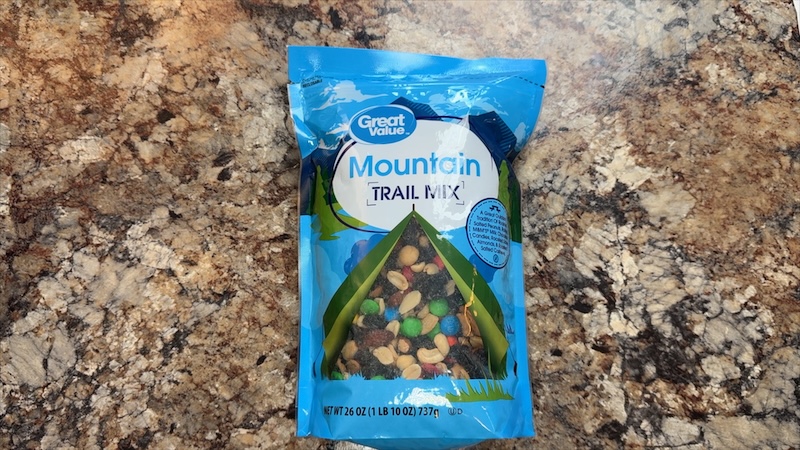
On the package, one serving of trail mix is a ¼ cup, which makes this one $0.34 per serving. Each serving of trail mix is 140 calories and has 4 grams of protein. I decided to bring 4 servings of trail mix or 1 cup, which came out to $1.36.
Snack Option #2: (2) Nature Valley Protein Peanut Butter Dark Chocolate Chewy Bars
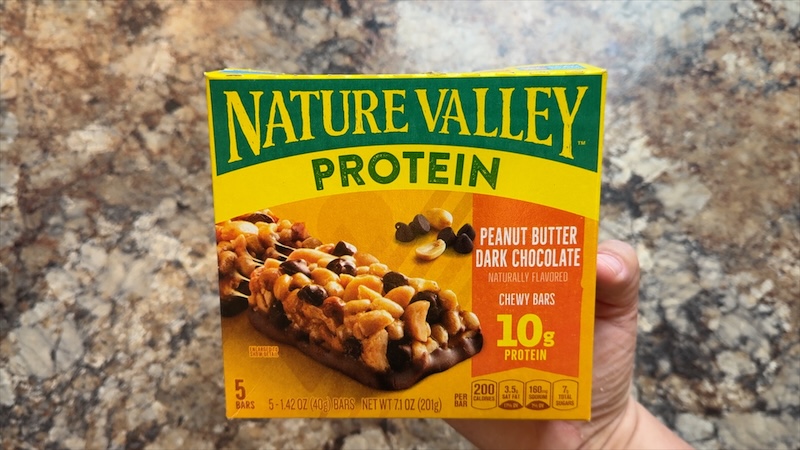
One box of 5 came out to $2.94, making these $0.59 per bar. Each bar has 200 calories and 10 grams of Protein. Instead of eating these as a snack throughout the day, I had them as dessert after each of my dinners.
Snack Option #3: (2) Walking Tamales in the Bean Salsa Roja Flavor
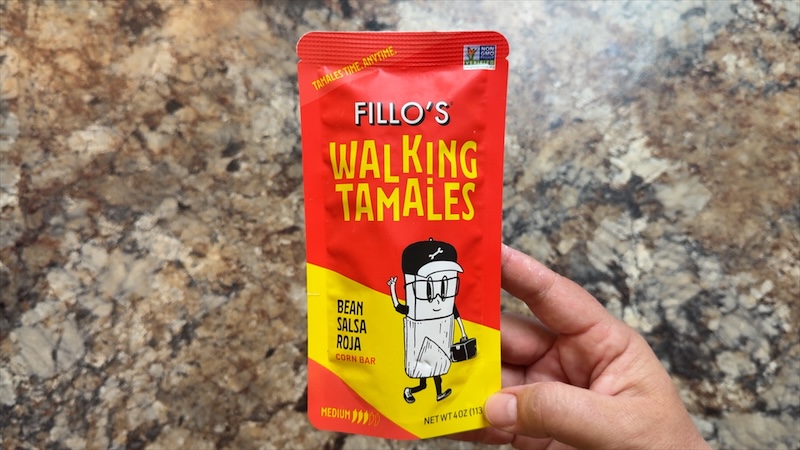
Each Walking Tamale has 250 calories and 6 grams of protein and comes to $1.98 each. These were definitely my most expensive snack on my meal plan, but they’re such an easy snack to eat out on trail, pretty filling and quite tasty, especially when they’re topped with a little bit of Taco Bell hot sauce.
I don’t go to Taco Bell very often, but when I do, I always make sure to accept their offer of adding hot sauce packets with my meal. I then stash these away with the rest of my backpacking meals and hiking snacks to use for future trips like this one.
Fun Fact: Walking Tamales are vegan friendly, gluten-free and can be eaten right out of the package!
Snack Option #4: A Can of BBQ Pringles
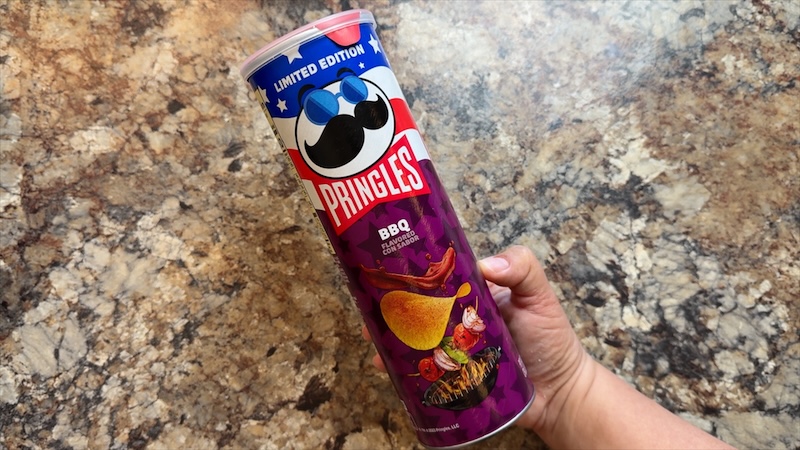
Okay, I have to admit. This one was an impulse buy. They were on sale for $2.00 and they reminded me of my most recent Nepal trek where we saw cans of Pringles for sale in almost all of the teahouses we stayed in.
Plus, I usually like to pack out some sort of crispy, salty chips with me whenever I’m out on trail. So, I splurged and got a can Pringles for my upcoming backpacking trip.
This can of Pringles contains 6 servings, which I split up into two Ziplock bags and packed very gently on top of all my food in my bear canister in an effort to keep the chips from getting crushed…and it worked!
Each can comes out to 900 calories or 150 calories per serving and has a total of 6 grams of protein or 1 gram of protein per serving.
The Pringles weren’t exactly the healthiest snack option in my meal plan, but they were one of my favorites and brought me a lot of joy during my trip. As a food motivated hiker, it’s really important to me that I enjoy the food I eat whenever I’m out on trail.
$20 Backpacking Meal Plan Challenge: DINNER
For dinner, I went with two different cheap and easy options. This way I didn’t have to have the same dinner each night during my trip.
Dinner Option #1 was a Knorr Rice Side and a chicken packet. I chose the Chicken Flavored Broccoli Rice Side for $1.28 and added in a single serving chicken pouch for $1.50 to bump up the calories and protein in my meal.
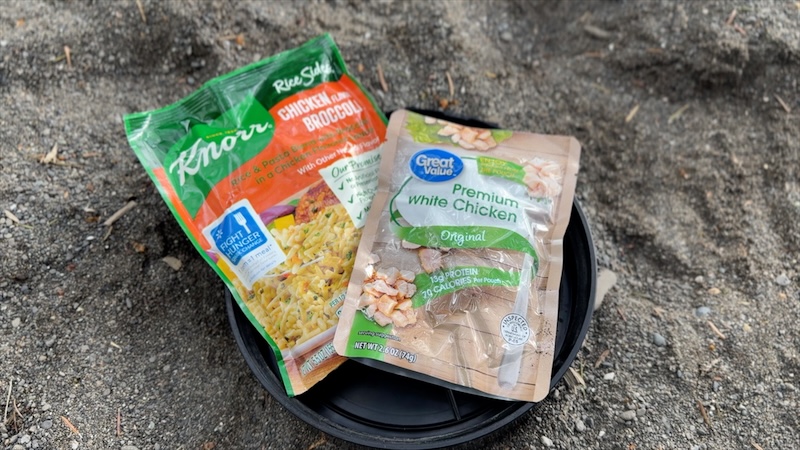
Since we weren’t hiking very many miles during the day on our trip, I wasn’t super hungry for my dinners. After preparing the whole package for dinner, I realized that I could’ve easily split the Knorr Rice Side into two portions, making this meal even cheaper.
Dinner Option #1 comes out to 510 calories, 27 grams of protein and costs $2.78 per meal.
Dinner Option #2 was Instant Loaded Baked Mashed Potatoes and a single serving chicken packet for extra protein. Since I only needed to add boiling water to cook the instant potatoes, I chose to cook this dinner in a freezer Ziplock bag instead of dirtying my pot like I had to do with the Knorr Rice Side.
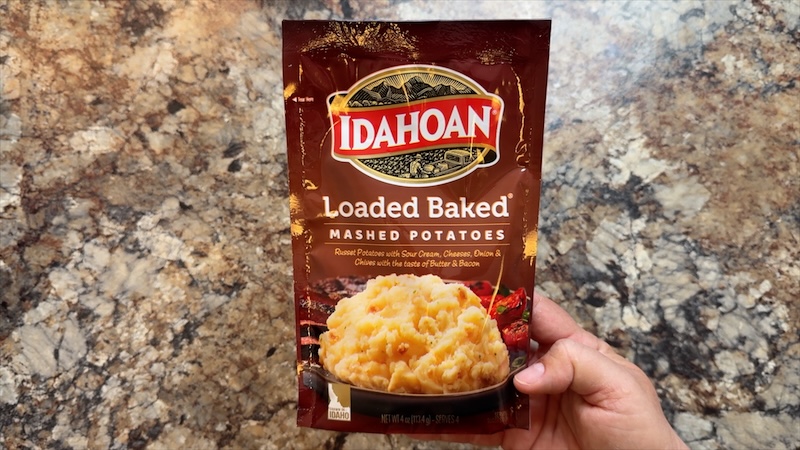
Again, I wasn’t super hungry for my dinners on this trip so I could’ve easily halved the packet of potatoes, making both the serving size smaller and the overall meal cheaper.
Dinner Option #2 comes out to 510 calories, 25 grams of protein and costs $2.94 per meal.
$20 Backpacking Meal Plan Challenge: ELECTROLYTES
For electrolytes, I decided to go with my store-bought favorite, which are these Gatorade Zero Sugar Powder Single Sticks in the Glacier Freeze flavor because blue Gatorade is my absolute favorite.
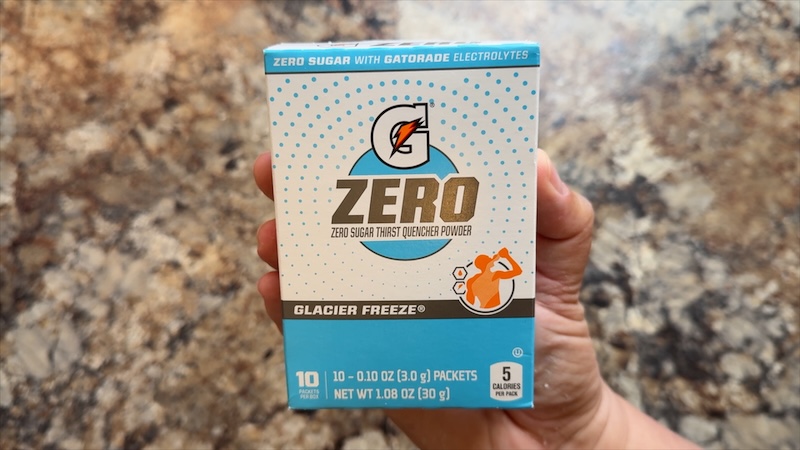
For this trip, I brought 4 of the single sticks so I could have the option to have either one of these each day or double up the packets if I wanted extra flavor.
One box of 10 Gatorade Zero Sugar Powder Single Sticks came out to $4.37, making these $0.44 per single stick.
$20 Backpacking Meal Plan Challenge: The Results
Now for the final results of my $20 Backpacking Meal Plan Challenge.
Was I able to stay within my $20 budget?
Did I have enough food for my 2-day/2-night backpacking trip?
My total grocery bill at WalMart was $41.58.
After coming home and portioning out each of my meals and snacks according to my meal plan for my trip, the total cost for my meal plan, which included: 2 Breakfasts, 2 Lunches, 2 Dinners, plus, 4 different snack options and electrolytes for each day I was out on trail came out to $23.52.
The amount of food I packed out for this trip ended up being $3.52 over my budget.
Remember how I mentioned earlier that I’m notorious for overpacking my snacks? For this trip, I came back with one of my Walking Tamales and ended up not eating any of the trail mix.
Had I only packed one Walking Tamale and skipped the trail mix, the total cost for my meal plan for this trip would’ve been $18.46, even with the impulse Pringles buy, which I still don’t regret that purchase. Those Pringles were gone before dinner on the second day of my trip.
Would I pack this same meal plan for a future backpacking trip?
Well, the Trail Pepperoni Pizza was a HUGE win for me and is easily my favorite meal I included in this challenge. It was easy to pack, the no-cook option made it super easy to prepare out on trail, it was filling, and it was delicious. I’ll definitely be including this no-cook lunch option on some of my upcoming trips later this year.
After completing this challenge though, I’ve come to the realization that after eating SEVERAL Knorr pasta and rice sides and packets of instant mashed potatoes along my PCT thru-hike back in 2018, I’m still sick of eating these, no matter what the flavor is or how cheap they are.
As a food motivated hiker, part of the reason why I decided to start making my own backpacking meals using both my food dehydrator and freeze dryer is so that I can expand my on-trail menu, allowing me to bring many of the meals I enjoy eating at home with me out on trail, without having to eat the same things over and over again.
CLICK HERE if you’re interested in checking out some of the backpacking meals I’ve put together for my upcoming hiking season.
Hopefully this post has given you some ideas on how to put together your own meal plan for your next trip, using cheap and easy options at your local grocery store, without breaking the bank.
DISCLAIMER: This post and video contain affiliate links, which means that if you click on one of the product links, I’ll receive a small commission at no extra cost to you. This helps support my blog, The Hungry Hiker and allows me to continue to create content for you free of charge. Thank you for your support!
Hi, I am also a Pacific NW. On the long beach peninsula. Love your website, YouTube content. Using your great ideas for food in my bug out bag. Easy, cheap, stable. Wonderful.thank you
Awesome! Thank you!
Thanks for such great ideas. We use lots of the Spring Products. Pretty expensive, but easy to carry and eat. Stay near your computer. We will be out for 10 days.