So you’ve decided to give day hiking a try, but you aren’t sure where to begin with planning your hike. I completely understand. I was there once too.
I get questions all the time about planning a day hike like:
- Where should I go?
- When should I go?
- What hiking gear should I bring?
- How do I keep from getting lost?
- Where do I start with planning a day hike?
In this blog post, I’m going to walk you through my entire process of how I plan a day hike, everything from how I decide where to go to figuring out what hiking gear I’ll bring with me. My hope is to help inspire you to start planning your own solo day hike. If you are on the fence about going on a solo day hike and find the whole trip planning process overwhelming and intimidating, then this post is for you.
I started going on solo day hikes back in 2015 as a way to train for some of the big trips I had coming up. Since then, I’ve gone on quite a few solo trips in the backcountry including numerous day hikes throughout the Pacific Northwest, thru-hiking the Pacific Crest Trail, solo backpacking the Grand Canyon Rim to Rim to Rim trail and doing multiple section hikes along the PCT, here in Washington by myself.
Benefits To Solo Day Hiking?
With solo day hiking, I don’t have to wait for someone else to go with me. I don’t have to worry about getting cancelled on. Plus, the more I get out on trail by myself, the more I fall in love with it. Solo day hiking means the freedom to go hiking wherever I want, whenever I want without having to work around anyone else’s schedule.
Step 1: Deciding Where To Go
Okay, so Step 1 for me when planning a day hike is deciding where to go. First, I start by thinking through my list of considerations before choosing a trail, which include:
- My trip objective
- How far I want to travel to get to the trailhead
- How many miles I want to hike
- The amount of elevation gain I want to hike
- Trail terrain
- The day of the week I’m hiking
- The time of the year
- Current weather forecast
- And if I need a parking permit to park at the trailhead (and if so, do I have the permit?)
For my most recent solo day hike, my main trip objective was to get out on trail and train. I’m currently training for my upcoming thru-hike on the Pacific Crest Trail later this year, so I wanted my hike to be at least 10 miles roundtrip, since I’ll be working my way up to 20+ mile days out on the PCT. I also wanted to hike a trail that had a significant amount of elevation gain.
Right now, as I’m writing this blog post, it’s March and is still considered winterlike conditions out on trail. This time of year is considered the shoulder season, which means it’s between winter and the warmer weather hiking season here in Washington state. Usually when I’m going somewhere solo during the winter or in the shoulder season, I tend to feel more comfortable choosing a trail that’s relatively close to home.
Luckily for me, there are a ton of trails within an hour’s driving distance from where I live, but a lot of them, especially at the higher elevation are currently covered in snow right now. So for my most recent solo day hike, I wanted to be mindful with the type of terrain I could possibly be hiking in and choose a trail that would be challenging, but still within my comfort level.
This also meant choosing a trail that’s familiar to me, something I’ve hiked before. With the possibility of traveling over snow, I also wanted to choose a trail that would be well-marked and well-traveled.
After checking out the weather forecast for the week, I saw that the warmest, sunniest days of the week would be Thursday through Saturday. Since I already had a group hike planned on Saturday, I chose to go on my solo day hike on Friday, not only because I knew the weather was forecasted to be nice, but also since most people would still be working on Friday, I wouldn’t have to deal with a super crowded trail.
As for the parking permit, I knew I had all of the required parking permits for the area so I didn’t worry about choosing a particular trail based on the parking permit I’d need at the trailhead.
Step 2: Research
Step 2 in my trip planning process is to research trails near me that meet my list of considerations.
For my most recent solo day hike, I knew I wanted to do a hike that was at least 10 miles roundtrip and would be over 2,000 feet of elevation gain and would be a short drive from home, something with under an hour or less of a drive to get to the trailhead.
Some of my favorite resources I love to use when looking for trails to hike include:
AllTrails
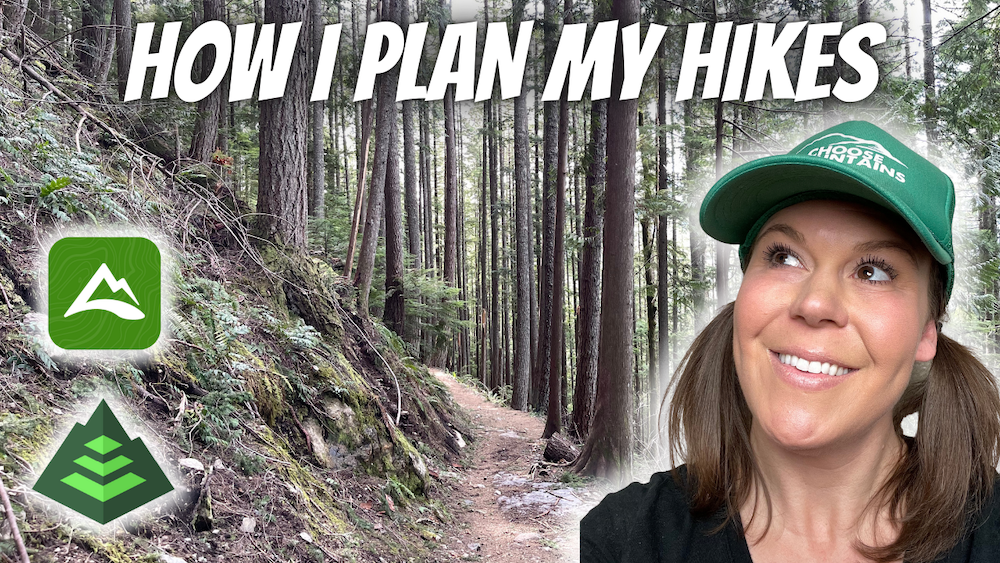
AllTrails is a free, online resource you can use to find trails anywhere in the United States and throughout the world. AllTrails includes an easy-to-use, searchable database of trails that also includes photos, directions to the trailhead, a description of the trail, trail features, current weather forecast for the area, trail maps and trail reviews written by other AllTrails users.
WTA
If you’re located within Washington state or are searching for hiking trails here in Washington state, the Washington Trails Association or WTA is another free, online resource you can use to find trails to go hiking on. Using either the Hike Finder Map and/or the Hiking Guide, you can set your preferred hiking trail perimeters and the WTA website will populate trails that match your search perimeters.
Each trail in the WTA database also includes a description of the trail, trail features such as length, elevation gain and highest point, trail features and regulations, parking pass info, a trail map, weather forecast for the nearby area, driving directions to the trailhead and trip reports written by WTA users.
Guidebooks
Another resource I love using when looking for trails to hike are guidebooks. If I’m looking to go hiking in a certain region, I’ll search for a hiking guidebook featuring that particular area.
For example, if I’m looking for hiking trails in and around Mount Rainier National Park, or in the Mount Adams and Goat Rocks area, local author Tami Asars has put together the following guidebooks I love to use for hiking inspiration:
Day Hiking Mount Rainier by Tami Asars
Day Hiking Mount Adams and Goat Rocks by Tami Asars
Both guidebooks feature a ton of trails that are organized by a specific area within the region and include all of the details you’d need for each trail including: beautiful photos, a difficulty rating, total mileage, elevation gain, the preferred season to hike the trail, trail descriptions, maps, and driving directions to the trailhead.
Step 3: Check The Conditions
Once I completed my trail research and put together my list of possible trails to hike, I then move on to Step 3, which is to do more specific research for each trail by checking the conditions including trail, road and weather.
Starting with trail conditions. Reading through the trail reviews on AllTrails and the trip reports on WTA’s website can be good indicators on the type of conditions you may come across when out on trail.
For road conditions, not only do I want to know the condition of the forest service road leading up to the trailhead, but if I plan on traveling over any mountain pass, I also refer to my state’s department of transportation to make sure the roads and highways are clear and safe to drive over.
And also, the current weather forecast. Since the forecast can change multiple times before I make it to the trailhead, I tend to check the current weather forecast for the area I plan on hiking at least a week prior to my hike, a couple of days before my hike, the night before and again the morning of my hike, just to be sure.
For my recent solo day hike, I decided to hike Mailbox Peak. It was within the total mileage and elevation gain I was looking for. The trailhead was under a 30-minute drive from my house, the roads were clear to the trailhead, the weather was forecasted to be warm and clear.
This was a trail I had hiked several times before, so I felt comfortable being on this one alone. Plus, since this trail is so popular, I knew I wouldn’t be the only hiker out there, even on a Friday, which made hiking the trail solo feel even more comfortable to me.
One thing I had to pay close attention to was that the gate to the upper parking lot at the trailhead closes at 4PM. I needed to be mindful of my start time so that I could make it back to my car in time before the gate closed.
Step 4: Planning The Hike
The fourth step in my trip planning process is to plan my actual hike. I can do this by either using a paper map of the area or a digital navigation tool like Gaia GPS.
Create A Route
To plan my hike, I start by creating a route for my hike. Once I’ve created my route, I then look at the map and note any potential water sources, side trails or landmarks I might want to check out while I’m out on trail.
Download & Test
After creating the route, if using a digital navigation took like Gaia GPS, I then download my route onto my phone and then make sure the route and map of the area shows up on my phone by turning my phone into Airplane mode to make sure the route shows up after downloading.
Parking Permit Check
Then, if there is a parking permit required when parking at the trailhead for the hike, this is the time where I’d check to make sure I have the needed parking permit.
Build A Trip Itinerary
Once you’ve created the route for your hike, you’ll want to build a trip itinerary for your hike.
Your trip itinerary should include things like:
- The name of the trail you’ll be hiking
- The trailhead you’ll be starting from
- Your planned start and end time
- Places you think you might stop at along the way
- And if you’re using a digital navigation tool like Gaia GPS, a link to the route you created for your hike
On your trip itinerary, you’ll also want to include emergency information like:
- Your emergency contact information
- A day and time your emergency contact should alert authorities if you don’t return
- Permission for your emergency contact to alert authorities if you don’t return
- The make, model and license plate number of your car and the location of where you parked your car
- Information about the local area you’ll be hiking in like the name of the county and contact information for local authorities in case of an emergency
Building a trip itinerary is a way for you to leave breadcrumbs for someone to come find you, should you not return back from your hike by your anticipated day and time of return. Once you build out your trip itinerary, you’ll want to either email it or print it out and leave it at home with someone whom you trust. Then, if you don’t return from your hike by your anticipated return time, your emergency contact can alert the authorities to come look for you out on trail.
If no one knows your missing, no one will know to come look for you should you get lost or injured out on trail and aren’t able to make it back to the trailhead by yourself. Always build a trip itinerary for every trip you go on out in the backcountry.
I’ve included a digital fillable and printable Trip Itinerary Checklist in my Backpacking Trip Planning Masterclass that helps take the guesswork out of what to include in your trip itinerary when you’re building one for your hike.
The final part of planning a hike is to put together a Plan B or alternate trail, just in case something happens where you can’t hike the trail you originally wanted to hike. Always have a backup plan and make sure you update your trip itinerary and emergency contact with any change of plans before getting out on trail.
Step 5: Hiking Gear To Bring
After planning the hike, it’s time to start figuring out what hiking gear you’ll need to bring.
WATER + WATER FILTRATION SYSTEM
For my recent solo day hike, I decided to bring two litters of water. I knew that there were two potential water sources along the trail so in case I ran out of water, I’d be able to use my water filtration system to filter any additional water I needed.
PACK
My winter day hiking pack is the Osprey Tempest 40 Liter, which is slightly larger than my warm weather day hiking pack, the Osprey Tempest 20 Liter because I have more stuff to carry when it’s cold out such as extra clothing layers and traction devices. Since my recent solo day hike was in March, it was still winter-like conditions out on trail, even with the warm and sunny weather, which meant I would be bringing my slightly bigger Osprey pack, the Tempest 40 liter.
THE 10 ESSENTIALS
I ALWAYS have the 10 Essentials packed in my pack for every hike I go on, no matter what time of the year it is or what trail I’m hiking. The 10 Essentials include: Navigation, illumination, shelter, extra water, extra food, extra clothes, sun protection, fire, knife/gear repair and a first aid kit
The 10 Essentials are important to always bring with you for any trip you go on out in the backcountry because they can help better prepare you for the worst-case scenario, just in case you have to spend more time out on trail than you originally anticipated.
If you want more information on the 10 Essentials including what they are and why they’re so important to always have with you in your pack on every hike you go on, click here.
NAVIGATIONAL/SEASONAL/LOCATION DEPENDENT GEAR
In addition to carrying some sort of navigation system, whether it’s a paper map and compass and/or a digital navigation app like Gaia GPS on your phone, you may also need seasonal/location dependent gear depending on when and where you’re going for your hike.
Based on the recent trail reviews and trip reports I had read for the trail I was planning on hiking, I knew there would be a substantial amount of snow towards the top of the trail. I packed my microspikes for my hike and ended up putting them on within two miles of being out on trail. I was also really happy I had packed my butt pad for my hike because this meant I didn’t have to sit directly on the snow when I stopped for lunch and was able to stay warm and dry while I was stopped.
ELECTRONICS
I like taking a lot of photos and videos when I’m out on trail so I always pack a camera and extra batteries with me. I also pack a battery pack charger, just in case I need to charge any of the electronics I bring with me out on trail like my phone and satellite messenger.
A PLB OR SATELLITE MESSENGER
I always bring my Garmin inReach on every hike I go on and I make sure it’s fully charged before starting my hike.
PACKED CLOTHING
For my hike, I not only had an additional insulating layer which was a fleece top and my rain jacket, but I also packed a pair of rain pants, a puffy jacket and liner gloves, just in case it was really cold at the top of my hike.
FOOD AND SNACKS
For my hike, I packed several of my favorite snacks that were easy to eat while out on trail. For lunch, I brought salami, cheese and crackers because it’s quick and easy. This ended up being the perfect lunch for this hike because I was limited in the amount of time I had to stop for a lunch break.
POOP KIT
I always bring this with me on every hike I go on, no matter what time of the year and what trail I’m hiking on because you never know when you gotta go.
TREKKING POLES
I always bring my trekking poles with me on every hike I go on, no matter what time of the year and what trail I’m hiking on.
MY 11th ESSENTIAL
An 11th Essentials isn’t a requirement by any means, but when I’m hiking during the cold, winter months, it’s always nice to pack a warm drink for any of my day hikes. It’s such a treat to have a warm drink like broth, tea or hot cocoa in my thermos ready to enjoy out on trail whenever it’s cold out.
Click here to see my hiking gear list of everything I brought with me on my recent solo day hike on my LighterPack.com list.
Also, if you’re still having trouble with figuring out what hiking gear to pack for your day hikes, I’ve put together and included a Day Hiking Gear Packing List in my Backpacking Trip Planning Masterclass, which helps take the guesswork out of what to pack for your next hike.
So now that you’ve seen my entire process of how I plan a solo day hike, you might still feel overwhelmed with planning your own trip. I totally get it!
Trip planning for any trip in the backcountry, whether it’s a solo day hike or overnight backpacking trip can be really overwhelming, especially if you’re new to hiking and backpacking. This is exactly why I created an easy-to-follow, easy-to-use, online trip planning masterclass.
The Hungry Hiker Backpacking Trip Planning Masterclass
The Hungry Hiker Backpacking Trip Planning Masterclass will help you learn how to plan your first or next backpacking trip in just 4 steps!
Not only will this class show you how to find trails near you, help you figure out the best time to go and what you should pack, but it also includes a number of video tutorials that will teach you how to use Gaia GPS and the FarOut Guide app to help plan your next trip so don’t get lost and also help you find places to camp and water sources when out on trail.
This class also includes digital resources you can use when planning your trip including detailed 2023 permit info, day hiking and overnight backpacking gear packing lists AND a digital fillable and printable Trip Itinerary Checklist that helps take the guesswork out of what to include in your trip itinerary for any of your future trips.
Most importantly, this class will help take the overwhelm out of the trip planning process!
Interested in learning more about The Hungry Hiker Backpacking Trip Planning Masterclass? Click here for more details and to enroll.
Disclaimer: The-Hungry-Hiker.com is a participant in the Amazon Affiliate Links and AvantlInks Program, affiliate advertising programs designed to provide a means for sites to earn advertising fees by advertising and linking to Amazon.com and other affiliated sites at no cost to you. Please note, I only link to products and services I personally use and trust.
Inspired? Pin It!
Thanks for sharing best information with us.