Who says you have to buy expensive, freeze-dried backpacking meals at outdoor retailers to take on your overnight backpacking trips? What if I told you that there are plenty of inexpensive, budget-friendly, cheap and easy backpacking meal options available at your local grocery store?
Over the years, I’ve tried my fair share of the pricey freeze-dried backpacking meals. While some of them are tasty, most of them are downright expensive. Guess what? Backpacking food doesn’t have to be expensive!
In this blog post, I’m going to share with you some of my new favorite cheap and easy backpacking meal ideas you can put together from the grocery store for your next backpacking trip.
- I’ll show you a few breakfast options as well as a few lunch and dinner options.
- I’ll share with you how many calories there are per serving and what the price per serving is for each meal.
- I’ll also share with you how I make each of these meals and how you can cook them in either a Freezer Ziplock bag or other reusable food storage containers without having to dirty your backpacking pot when out on trail.
Why Shop for Backpacking Food at The Grocery Store?
It’s cheaper! Instead of buying the expensive freeze-dried meals at an outdoor retailer, you can visit your local grocery store to get some ideas for backpacking meals you can put together for your next trip.
It’s convenient! Not only is the food at a grocery store less expensive and much more budget friendly, but shopping at a grocery store for backpacking food is really convenient. You’re more likely to have a grocery store nearby than an outdoor retailer.
Make your backpacking meals just the way you want them. You can easily add more calories, crunch, flavor and texture to any of your grocery store backpacking meals by adding toppings like Crispy Dillies, which are fried cucumbers, crispy fried onions, chopped nuts and even bacon bits. If you have food allergies and sensitives, you can literally create any backpacking meal exactly the way you want it by shopping for backpacking food at the grocery store.
Cheap and Easy Backpacking Food Pro Tip
Next time you’re at a restaurant, getting takeout or ordering fast food or coffee, take a look at the condiments area. Keep all of those salt and pepper, sugar and sauce packets.
I like collecting condiments packets like soy sauce, BBQ sauce, hoisin sauce, hot sauce, salt and pepper, sugar and honey packets and then add them to my backpacking food bin. This way, when I go to put together backpacking meals for an upcoming trip, I have smaller versions of various condiments and seasonings already conveniently packed up and ready to be used when out on trail. And they’re free!!
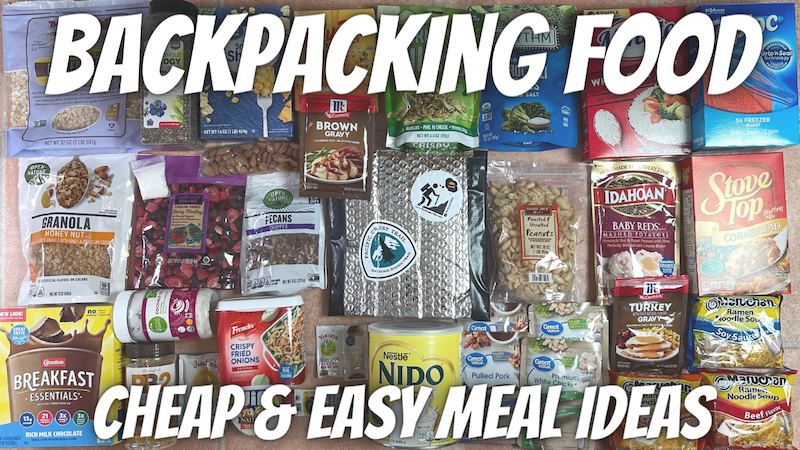
Here are some of my favorite grocery store cheap & easy backpacking meal ideas you can get at the grocery store for your next backpacking trip.
Breakfast Grocery Store Cheap & Easy Backpacking Meal ideas
Breakfast Rolled Oats
You can never go wrong with having rolled oats or some type of oatmeal for breakfast. Usually, I don’t like to cook breakfast when I’m out on trail because I’d rather pack up camp and get started hiking for the day instead of pulling out my stove and waiting for my first meal of the day to cook.
If I do want to take the time to cook breakfast, Breakfast Rolled Oats is a hearty and easy option. At home, I’ll put together my Breakfast Rolled Oat dry mixture featuring:
- ½ cup of Rolled oats
- 2 tbsp of a mix of hemp hearts, chia seeds, flaxseed
- ¼ cup of chopped almonds
- I can also add in some freeze-dried fruit and even a couple sugar packets to sweeten it up.
In a separate container, I’ll add powdered dry whole milk to be added to my oats after I’ve rehydrated them.
To make this one out on trail, start by boiling 1 cup of water. Then add the boiling water to my rolled oats mixture. Give it a little stir and then add it to your Backpacking Food Cozy and let it sit for 10 minutes. While the oats are rehydrating, mix together some water and powdered dry whole milk to make the milk for my oats. Once the oats have rehydrated, add the powdered dry whole milk mix, stir everything together and then enjoy.
For more calories and a creamier texture, you can also add either a peanut butter or almond butter packet to the rolled oats mixture after rehydrating.
640 calories per serving
Costs $1.68 per serving
Chocolate Peanut Butter Shake
Another cheap and easy breakfast option is one you don’t even have to cook. The Chocolate Peanut Butter Shake is a quick, cheap and easy recipe I discovered through The Backcountry Foodie.
Visit The Backcountry Foodie for dietitian-created ultralight recipes, backpacking meal plans, nutrition coaching, and resupply coordination. Use coupon code “HUNGRYHIKER20” to get 20% off!
If you’re like me and find that you’re not super hungry when you wake up in the morning when out on trail, there’s always the option to drink the calories you need to get you going. And the best part about this option is that there’s no cooking required!
Before getting out on trail, put together 1 packet of the Carnation Breakfast Essentials drink mix in the chocolate flavor, ½ cup of dry powdered whole milk and ¼ cup of powdered peanut butter.
When you’re ready to drink this one, simply add 1 cup of water to the powdered mix, shake and then enjoy. You can even drink this one while you’re hiking, making it even more convenient.
550 calories per serving
Costs $2.04 per serving
Breakfast Berry Cobbler
The Breakfast Berry Cobbler is also another recipe I discovered thanks to The Backcountry Foodie. It’s delicious and super easy to make. You could even turn this one into a backpacking dessert if you wanted to.
Visit The Backcountry Foodie for dietitian-created ultralight recipes, backpacking meal plans, nutrition coaching, and resupply coordination. Use coupon code “HUNGRYHIKER20” to get 20% off!
At home, put together all of the dry ingredients in a Ziplock Freezer quart-sized bag or some other reusable container that can withstand boiling water.
The dry ingredients include:
- ½ cup of freeze-dried berries, which ends up being one whole bag of freeze-dried fruit you can find at the grocery store
½ cup of granola
2 Tbsp of chopped pecans, chopped
1 tsp of a mix of hemp hearts, chia seeds, flaxseed
1 sugar packet
In a separate container, pack 1 tbsp of coconut oil. For the coconut oil, you might be able to find single serving packets online at Amazon or try making your own by using small, mini self-locking plastic bags (which you can also get from Amazon) and adding 1 tbsp of coconut oil to each bag and then seal them up to bring with you out on trail.
I recommend double bagging the coconut oil, in case they leak inside your food storage container or bag.
To make this one out on trail, boil ½ cup of water and then add both the boiling water and the single serving coconut oil packet to the dry berry mixture. Give it a stir and then add this to your backpacking food cozy and let it rehydrate for 10 minutes. Once the berries have rehydrated, give this one a stir and then enjoy.
575 calories per serving
Costs $5.21 per serving
Lunch and Dinner Grocery Store Cheap & Easy Backpacking Meal Ideas
Cheese, Crackers and Salami
One of my all-time favorite backpacking meals is having cheese, crackers and salami together, which is also considered a no-cook option. This means I don’t need to pull out my backpacking stove for this one. The only preparation required for this meal is cutting the cheese and salami, unless you opted for the pre-sliced salami at the store.
No cook options are perfect if you’re looking to have a quick meal that doesn’t require any fuel or water.
I typically go for a peppered salami, but you can choose any type of shelf stable meat. Shelf stable meat doesn’t require any refrigeration and can last for a few days out on trail as long as you keep it out of direct sunlight and in a cool, dry place deep within your pack in your food storage bag or container.
I get A LOT of questions about how I’m able to bring cheese out with me on trail safely. Yes, cheese typically needs to stay refrigerated, but just like with shelf stable meat, if you can keep your cheese out of direct sunlight and in a cool, dry place deep within your pack in your food storage bag or container, your cheese can last for a couple of days without refrigeration.
Since this tends to always be my favorite meal when I’m backpacking, the cheese and salami in my pack never seemed to last in my food bag or container very long because it’s one of the first things I eat when I’m out on trail.
Also, choose your cheese wisely! If you’re backpacking in warm weather or the summer months, choose a hard cheese and try to keep it stored in its original packaging until you’re ready to eat it.
If you’re backpacking during the winter or in cooler, colder weather, you can go with a softer cheese like Brie because it will last much longer than if you were in warm weather. I like to keep the softer cheeses stored in a small, hard sided container for extra protection inside my food bag or container.
Depending on the type of cheese you get, this meal can come out to:
330 calories per serving
Costs $2.31 per serving
BBQ Mac N Cheese
The BBQ Mac N Cheese recipe is probably one of my most favorite out all of the grocery store backpacking meals featured in this post. Not only is it cheap and easy to make, but it’s also REALLY tasty.
To make this one out on trail, start by boiling 1 cup of water. Add the boiling water to ½ cup of shell noodles in either a Freezer Ziplock quart-sized bag or some type of reusable food container that can withstand boiling water. Give the noodles a stir and then add this to your backpacking food cozy and let it rehydrate for 5-10 minutes.
Once the noodles are done rehydrating, drain any extra water. Then add a 4 oz Velveeta Cheese sauce pouch, a whole 2.6 oz pouch of pre-cooked pulled pork in BBQ sauce and a to-go packet of BBQ sauce.
Stir together and for some extra flavor and crunch, add a few Crispy Dillies on top.
776 calories per serving
Costs $2.75 per serving
One Pot Thanksgiving Dinner
If you’ve seen some of my previous backpacking food recipe videos on my YouTube Channel, The Hungry Hiker, you might have noticed that the One Pot Thanksgiving Dinner isn’t a new cheap and easy grocery store backpacking meal featured on my channel. It’s a classic favorite cheap & easy grocery store backpacking meal, but now with some new additions!
To make this one, start at home by adding the following dry ingredients in either a Freezer Ziplock quart-sized bag or some type of reusable food container that can withstand boiling water:
- ½ cup instant mashed potatoes
- ½ cup Stove Top stuffing
- 1 tbsp powdered gravy
- 1 tbsp pepitas
- 1 tbsp chopped pecans
When you’re ready to make this one out on trail, boil 1 and ½ cups of water and add to the dry potato/stuffing mixture. Stir and then add this to your backpacking food cozy and let it rehydrate for 5-10 minutes.
Once rehydrated, add a 2.6 oz pouch of pre-cooked white chicken breast and ½ cup of fried onions. Stir and serve. Feel free to add more fried onions on top for some extra crunch.
672 calories per serving
Cost $4.10 per serving
Cheesy Chicken Casserole
The Cheesy Chicken Casserole is the most expensive backpacking meal featured in this post, but it has the most base options when putting this one together. What makes this one so pricey is that you have to use a whole bag of the dried broccoli bites for one serving and the dried broccoli bites can be a bit pricey.
For a less expensive option, you can always dehydrate broccoli at home to add to this recipe, but that will take more time when preparing to put this one together for the trail and you might not have access to a food dehydrator.
You can either use Stove Top Stuffing, instant rice or couscous as a base for this one. I decided to go with the couscous.
To make the Cheesy Chicken Casserole, start by boiling 1 cup of water. Then, add either the stuffing, instant rice or couscous and a 1.4 oz bag of dried broccoli bites to the boiling water in a Freezer Ziplock quart-sized bag or some type of reusable food container that can withstand boiling water. Stir all of the ingredients together and then add this to your backpacking food cozy and let it rehydrate for 5-10 minutes.
Once rehydrated, add a 4 oz Velveeta Cheese sauce pouch, a whole 2.6 oz pouch of pre-cooked chicken breast, crispy fried onions and then stir. For extra flavor and crunch on top, you can add either crushed crackers or chips.
839 calories per serving
Costs between $4.76 and $8.13 per serving, depending on which base and broccoli option you use for this one.
Backcountry Pad Thai
And finally, if you’re sick of eating ramen out on trail, Backcountry Pad Thai is a cheap and easy way to mix up normal, boring ramen noodles and turn them into a tasty, calorie-heavy option.
This is the highest calorie option out of all of the backpacking meals featured in this post.
First, start by boiling 1 and ½ cups of water. Add ramen noodles and boiling water into a Freezer Ziplock quart-sized bag or some type of reusable food container that can withstand boiling water, like this CNOC Outdoors Buc Food Bag. Stir and then add to your backpacking food cozy and let it rehydrate for 5-10 minutes.
Once the noodles have rehydrated, drain the water from the food bag and then add:
- The ramen seasoning packet
- 1 small olive oil packet
- 1 small Peanut Butter packet
- 1 to-go sized soy sauce packet
- 1 to-go sized honey packet
- (1) 6 oz pouch of pre-cooked chicken breast
- 1 tbsp crushed peanuts
Mix all of these ingredients together and then enjoy.
For more nutritional value (and an added cost), you can also add dried vegetables like dried broccoli bites or any other dried vegetables you might find at the grocery store when cooking the ramen noodles.
945 calories per serving
Costs $3.46 per serving
Remember, backpacking food doesn’t have to be expensive! The next time you’re putting together your meal plan for an overnight backpacking trip, instead of buying the expensive, freeze-dried backpacking meals at an outdoor retailer, visit your local grocery store.
Pick up the ingredients for any of the cheap & easy grocery store backpacking grocery store food options mentioned in this post or browse the aisles to get some backpacking meal ideas you can put together from the grocery store for your next backpacking trip.
DISCLAIMER: This post and video contain affiliate links, which means that if you click on one of the product links, I’ll receive a small commission at no extra cost to you. This helps support my blog, The Hungry Hiker and allows me to continue to create content for you free of charge. Thank you for your support!
Inspired? Pin It!
Thank you for your program. My wife and I enjoy your YouTube shows. We have been canoeing, hiking, camping for many years.
I live for 10 years in Deer Lodge just south of Missoula. I was a National Park Range at Grant-Kohrs Range.
Visit their.
Awesome! Thanks for watching my YouTube videos!
this was usefully for my cooking merit badge for Boy socuts
same
why do you need the cozy? can you not just use the pot ?
A food cozy is typically insulated and can help rehydrate meals faster in the backcountry without having to use more fuel or dirty a pot. I typically don’t cook my meals in my pot. I’ll use my pot to boil water and then rehydrate my meals in a Ziplock freezer bag and then let the meal fully rehydrate in a cozy. This way I don’t have to clean out my pot and do dishes at camp.
Hi Kathleen,
Thanks for the tips! Can you really put boiling water in a ziplock freezer bag? Yikes!
Great question. This is one of those “backpacking gray areas.” A lot of hikers (myself included) use freezer-grade Ziplock bags for adding hot/boiling water to meals out on trail. They hold up perfectly fine for quick meals that need to be rehydrated. That’s why you’ll see it used so often by backpackers. With that said, it’s important to know it’s their bags are not officially recommended by Ziplock for boiling water, so this really comes down to personal comfort level. Do what feels most comfortable for you. If that method feels a little too sketchy, there are great alternatives like heat-safe bags or you can cook your meals directly in your pot instead. There’s no “one right way”. It’s just what works best for your trip and peace of mind.