
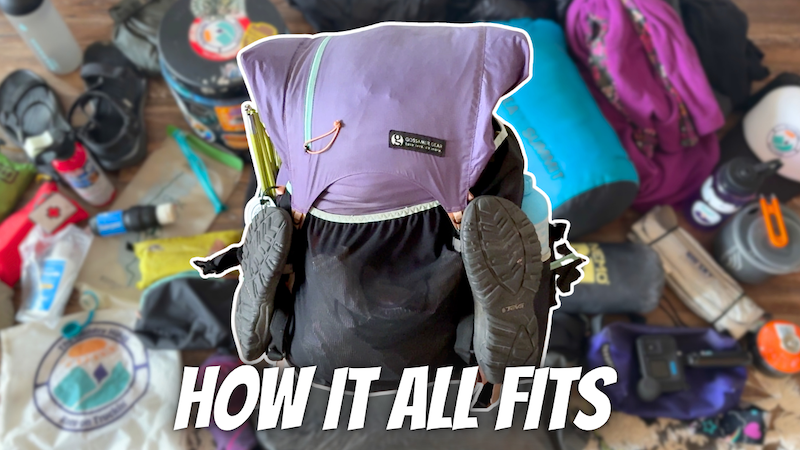
If you’ve ever stood in the middle of your living room surrounded by piles of backpacking gear and wondered, “Did I forget something?”, you’re not alone.
When I first started backpacking, packing for a trip felt overwhelming.
I’d spread all of my gear across the floor and stare at it, trying to remember whether I had everything I needed.
- Did I pack my first aid kit?
- What about my headlamp?
- Did I remember my repair kit and toiletries?
- And where did I put my water filter?
It wasn’t usually the big pieces of gear I was worried about forgetting. It was all of those little things that somehow didn’t pop into my head until I was already a few miles up the trail.
Over the years, I’ve realized that the problem wasn’t my gear.
It was how I thought about packing it.
Instead of trying to remember 30 or 40 individual pieces of gear, I started organizing everything into simple systems.
And this completely changed the way I pack for all of my backpacking trips.
In this post, I’m going to show you the 12-system method I use to pack my backpacking pack, including the gear I currently use and how I organize everything before heading out on trail.
Why I Pack My Backpacking Gear in Systems
Before I started using this method, packing meant looking at a giant pile of gear and trying to mentally check everything off my list.
That was exhausting.
Now, instead of thinking:
- Did I pack my headlamp?
- Did I pack my sunscreen?
- Did I pack my toothbrush?
- Did I pack my repair tape?
- Did I pack my knife?
I think: Did I pack my Repair/Tool/Toiletry System?
It’s a much easier way for me to think about packing.
I organize my gear into 12 systems:
- Pack
- Shelter System
- Sleep System
- Cooking System
- Packed Clothes
- Water Filtration System
- Repair/Tool/Toiletry Kit
- First Aid Kit
- Poop Kit
- Miscellaneous/Seasonal Gear
- Electronics
- Worn Clothes
I also use LighterPack to create a checklist for each trip. I organize my list using these same categories and then list each individual piece of gear underneath the appropriate system. That way, I can work through my packing list one system at a time instead of trying to remember everything at once.
My Backpacking Gear List (with links)
I also created a free Backpacking Gear Packing List based on this same system if you’d like to use it for your own trips.
Download Your FREE Backpacking Gear Packing List
1. Pack System
Everything starts with the pack.
For my warm-weather backpacking trips, I’m currently using my Gossamer Gear Mariposa 60.
If you’ve watched some of my previous gear videos, you may have noticed that I’ve gone back to using this older pack.
Gossamer Gear has since updated the Mariposa with a new frame system, but the newer design didn’t fit my body nearly as comfortably.
My older Mariposa still fits me really well and easily holds the gear I bring on my overnight trips, even when I’m carrying a hard-sided bear canister.
And while my pack may be a little faded after years of use, it still works beautifully.
That’s one of the biggest lessons I’ve learned about backpacking gear:
You don’t need to replace gear simply because something newer comes along.
Once you find gear that works well for your body, your preferences and the types of trips you go on, there’s often no reason to replace it.
If it still works, I’m going to keep using it.
2. Shelter System
My shelter system is where you’ll find one of the biggest changes I’m making to my gear this year.
I’m currently testing Gossamer Gear’s new freestanding tent, The Free.
I’m excited to see how it performs because this is a different style of shelter than I’ve used in the past.
I’m not going to do a full review here because I want to spend more time using it first.
I’ll be looking at things like:
- How easy it is to set up
- How comfortable it is to sleep in
- Who the tent is best suited for
- What I like and don’t like about it
- How it performs in different conditions
- Whether I’ll continue using it for future trips
I’ll be sharing a dedicated review once I’ve had enough nights in the tent to give you my honest opinion.
3. Sleep System
My sleep system hasn’t changed much over the last few years and that’s intentional.
I’m currently using:
- Nemo Tensor Extreme sleeping pad
- Flextail Zero Pump
- Enlightened Equipment quilt
- Sleeping bag liner
- Inflatable pillow
- Lightweight camp booties
- Sleeping clothes
- 13-liter dry sack
The reason I haven’t changed this system is pretty simple:
It works for me.
I sleep well, I stay warm and I’m comfortable.
Once I find backpacking gear that works, I don’t want to spend a bunch of time thinking about replacing it. That’s exactly what I want from my sleep system.
4. Cooking System
My cooking system has also stayed pretty much the same for the last few years.
I’m using my JetBoil Stash to boil water and then rehydrate my meals inside an insulated food bag.
I like this setup because it’s lightweight, boils water quickly and has been extremely reliable for me.
I’m also firmly on Team Long-Handled Spoon.
For food storage, what I bring depends on where I’m hiking.
For this particular trip, I used a BV450 hard-sided bear canister, which works well for an overnight or shorter multi-day trip.
I also use a Hilltop Packs food bag for the food and snacks I want to access throughout the day. I keep that food bag in the outside mesh pocket of my pack. That way, I don’t have to dig through my entire backpack every time I want a snack or stop for lunch.
5. Packed Clothes
Clothing is one of the easiest places to overpack.
I try to bring only what I think I’ll really use based on the forecast, season and conditions.
There is one exception: I always bring a rain jacket.
Even if there’s not a single cloud in the forecast. Because the one time I decide I don’t need it? It will rain.
For this trip, my packed clothing included:
- Rain jacket
- Lightweight puffy jacket
- Fleece dress
- Extra underwear
- Extra socks
- Liner gloves
- Camp shoes
My camp shoes can also double as water-crossing shoes and work well for getting in the lake.
Over the years, I’ve learned that I don’t need a different outfit for every day I’m out on trail. I just need the right layers for the conditions I’m most likely to encounter while I’m out there.
6. Water Filtration System
I keep my entire water filtration system together and accessible on the outside of my pack.
This is important because water is something I may need to access several times throughout the day.
My water system includes:
- Water filter
- Dirty water bag
- Smaller drinking water bottle
- Shoulder-strap bottle sleeve
- 1-liter drinking water bottle
- Small Nalgene bottle for electrolytes
Keeping everything together means I don’t have to dig through my pack whenever I need to filter water.
7. Repair/Tool/Toiletry Kit
This is one of my favorite systems because it takes care of all those little things that are so easy to forget.
Instead of having these items scattered throughout my backpack, I keep them together in one bag.
Depending on the trip, my kit includes things like:
- Headlamp
- Buff
- Toothbrush and toothpaste
- Sunscreen
- Travel brush
- Tenacious Tape
- Krazy Glue
- Knife
- Paracord
This is exactly why I like the systems approach. I don’t have to remember every individual item. I just need to remember: Pack the Repair/Tool/Toiletry Kit.
8. First Aid Kit
I use the same approach with my first aid kit.
Instead of trying to remember every individual item, I keep everything together inside a small Hilltop Packs pouch.
I also like using different-colored bags for my different systems because it makes them much easier to identify inside my backpack.
One important reminder: check the expiration dates on the medications and other items in your first aid kit.
I like to go through mine at the beginning or end of the season so I don’t accidentally end up on trail with expired medications.
If you want to see exactly what I carry and how to create your own backcountry first aid kit, check out this blog post HERE.
9. Poop Kit
Okay, I know talking about poop isn’t exactly glamorous. But everyone does it. So let’s talk about it.
My poop kit includes:
- Lightweight trowel
- Kula Cloth
- Powdered soap
- Hand sanitizer
- Compressed towels
- Doggie bags for packing used towels out
I keep everything together in a bright yellow poop-emoji bag. And yes, I absolutely love this ridiculous little bag. I keep it in an outside pocket of my backpack so it’s easy to grab when nature calls.
10. Miscellaneous & Seasonal Gear
This is the system that changes the most from trip to trip.
What I put here depends heavily on the season and the conditions I’m expecting.
My trekking poles are usually part of this system.
I may also add:
- Bug protection
- Head net
- Picaridin
- Microspikes
- Other seasonal gear
For this particular trip, I knew bugs could be an issue, so I brought my bug protection system, including my head net and Picaridin lotion.
In colder or snowier conditions, this is where things like microspikes might make their way into my pack.
11. Electronics
My electronics system stays together so I know exactly where everything is.
My basic electronics include:
- Cell phone
- Satellite messenger
- Battery bank
- Charging cables
Since I also film many of my backpacking trips, my electronics system includes some additional camera gear.
For this trip, that included:
- GoPro
- Small selfie stick
- Extra batteries
Having all of my electronics together makes it much easier to keep track of charging cables, batteries and other small pieces that could easily disappear inside a backpack.
12. Worn Clothes
Finally, we have my worn clothes. This is basically the clothing I’m wearing while hiking.
During the warmer months, that usually includes:
- Purple hiking dress
- Sun hoodie
- Trail runners
- Socks
- Lightweight gaiters
- Trucker hat
- Sunglasses
I also wear my fanny pack across my shoulders while hiking.
It’s an easy way to keep things I want to access frequently within reach, including:
- Snacks
- GoPro
- Extra batteries
- Phone
- Sunglasses
I don’t have to stop and take my backpack off every time I want something.
How I Pack Everything Into My Backpack
Once I’ve gone through all 12 systems, I lay everything out and start packing.
This is where the system really pays off.
Instead of looking at a giant pile of gear and wondering where to start, I simply work through my systems one at a time.
Pack
Shelter
Sleep
Cooking
Clothing
Water
Repair/Tool/Toiletry
First Aid
Poop Kit
Miscellaneous
Electronics
Worn Clothes
As each system gets packed, I check it off my list. And by the time I leave for the trailhead, every system is checked off.
That’s the part that gives me peace of mind. I don’t have to rely on my memory. I have a system.
The Real Test Happens on Trail
Of course, a packing system isn’t very useful if it only works at home. The real test happens once I’m out on trail.
When I need to filter water, I grab my water system.
When it’s time to cook, I grab my cooking system.
When I need to use the bathroom, I grab my poop kit.
When I’m ready for bed, my sleep system is already organized and ready to go.
I’m not digging through my backpack looking for individual pieces of gear. I know where everything is. And that means I can spend less time worrying about my gear and more time enjoying the places I’m hiking to.
Packing Up Camp
Packing up camp is basically the same process I use at home, just in reverse.
I pack up my sleep system.
Break down my shelter.
Put my cooking system away.
Pack my clothing.
Put my water system back where it belongs.
And then work through the remaining systems until everything is back inside my pack.
I also try to put each system back in the same place every time.
That consistency makes packing up much faster. And it gives me another opportunity to notice if something is missing before I leave camp.
Want My Backpacking Gear Packing List?
If packing for a backpacking trip still feels overwhelming, I created a free Backpacking Gear Packing List based on the same 12-system method I use before my own trips.
It gives you a simple framework for organizing your gear so you don’t have to rely on your memory to remember every little thing.
Download your FREE Backpacking Gear Packing List here