
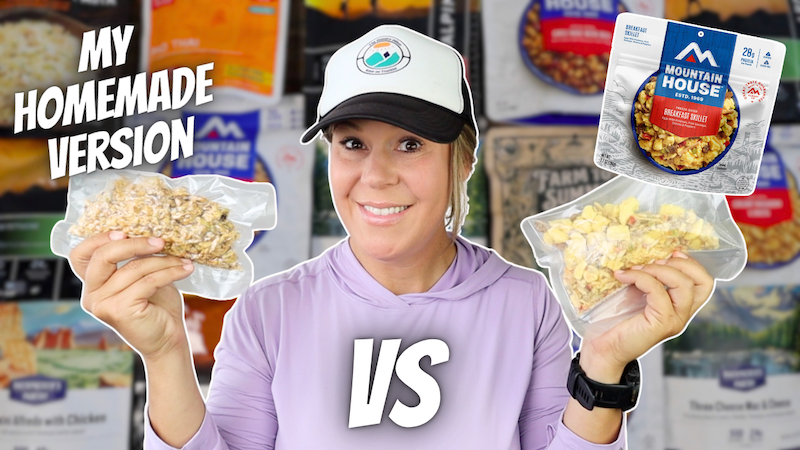
Almost 10 years ago, on my very first backpacking trip, I shared a bag of Mountain House Breakfast Skillet with my best friend while we waited out a snowstorm inside our tent.
I’ll never forget that breakfast.
Maybe it was because we were cold. Maybe it was because we were hungry. Or maybe it really was just that good.
Either way, that meal became one of those core backpacking memories that stuck with me.
Fast forward nearly a decade, hundreds of backpacking trips later and countless homemade backpacking meals and I found myself wondering:
Could I recreate Mountain House’s Breakfast Skillet at home and make an even better version?
So that’s exactly what I set out to do.
I started with a Breakfast Skillet recipe from Kitchen Swagger as inspiration, made a few changes to better match the Mountain House version, then freeze-dried it for backpacking.
The result was a hearty, protein-packed breakfast that’s become one of my favorite homemade backpacking meals.
Homemade Freeze-Dried Breakfast Skillet
Ingredients
- 1 (20 oz) bag Simply Potatoes Southwest Style Hash Browns
- 6 large eggs
- 16 oz breakfast sausage (ground pork sausage)
- 1 green bell pepper, diced
- ½ medium yellow onion, diced
- ½ cup shredded cheddar cheese
- 2 tbsp olive oil
- 1 tsp garlic powder
- 1 tsp onion powder
- ½ tsp paprika
Cooking Instructions
- Preheat your oven to 400°F.
- In a bowl, scramble the eggs and set aside.
- Brown the breakfast sausage in a large skillet. Drain any excess grease and set the sausage aside.
- Heat 1 tablespoon olive oil in a large non-stick skillet over medium heat.
- Add the diced onion and green pepper. Cook for about 4 minutes until softened.
- Add the hash browns, remaining tablespoon of olive oil, garlic powder, onion powder and paprika.
- Stir occasionally and cook for 5-7 minutes until the potatoes begin to turn golden brown.
- Stir the cooked sausage back into the potato mixture.
- Add the shredded cheddar cheese and stir until completely melted.
- Transfer everything into a cast iron skillet or baking dish.
- Pour the scrambled eggs evenly over the top.
- Bake for approximately 10 minutes, or until the eggs are fully cooked.
Freeze-Drying Instructions
- Allow the Breakfast Skillet to cool completely.
- Spread the mixture into an even layer on your freeze dryer trays.
- Load the trays into your freeze dryer.
- Run a normal freeze-drying cycle until the food is completely dry. (My batch took a little under 24 hours.)
- Remove the trays and allow the food to cool to room temperature.
- Break the meal into individual serving portions. (1 Serving = 1 ¼ cup dry mix)
- Vacuum seal each serving in a Mylar bag or vacuum-seal bag with an oxygen absorber for long-term storage.
Rehydrating on Trail
- Pour one serving into your cook pot, mylar bag or Ziplock Freezer Bag.
- Add enough boiling water to fully cover the meal. (Start with a little less than you think you’ll need. You can always add more.)
- Stir well.
- Cover your pot/close your bag and let it sit for about 10-15 minutes.
- Stir again and add a splash of water if needed until you reach your preferred consistency.
- Enjoy!
Pro Tip: It’s much easier to add more water than to fix “Breakfast Skillet soup.”
Nutrition Information
Serving Size
- 1 cup prepared
- Approximately 1¼ cups freeze-dried
Recipe Yield: 6 servings
Per Serving: 473 Calories, 23 g Protein, 23 g Carbs and 34 g Fat
Why I Like Making My Own Backpacking Meals
One question I get all the time is:
“Isn’t buying a freeze dryer expensive?”
The short answer is yes.
If your only goal is to recreate this one recipe, I wouldn’t recommend buying a freeze dryer just to save money.
For me, though, that’s not why I own one.
I use my freeze dryer throughout the year to extend the life of my leftovers, prepare meals for backpacking and car camping trips and build a pantry full of ready-to-eat meals. I also love being able to control exactly what goes into my food.
Making my own meals lets me:
- Add more calories for long hiking days
- Increase the protein content
- Adjust the seasonings to my taste
- Control the ingredients
- Customize portion sizes
- Reduce sodium compared to many commercial backpacking meals
For me, those benefits are just as valuable as the cost savings on ingredients.
Watch the Full Comparison
Want to see the complete side-by-side comparison?
In my video, I compare the homemade version and Mountain House’s Breakfast Skillet in five categories:
- Cost
- Nutrition
- Weight
- Convenience
- Blind taste test
Plus, I break down the real cost of owning a freeze dryer and whether making your own backpacking meals actually saves money.
Recipe Inspiration
This recipe was inspired by the Breakfast Skillet recipe from Kitchen Swagger and adapted to more closely match Mountain House’s classic Breakfast Skillet while increasing the calories and protein for backpacking.
Learn how to make your own backpacking meals with some of my favorite recipes:
Backcountry Spaghetti
Coconut Cashew Curry With Couscous
Dehydrated Pasta Penne Alfredo
Sweet & Spicy Homemade Trail Mix
Holy Molé Breakfast Bars
White Bean & Sausage Soup
Backcountry Chicken Pot Pie
Spicy Chicken Soup
Homemade Honey Nut Granola
Beef Stroganoff
Chicken & Dumplings
Biscuits & Gravy
Chili & Cornbread
Hamburger Pie
Chicken Fajitas & Guacamole
Corned Beef & Cabbage
DISCLAIMER: This post and video contain affiliate links, which means that if you click on one of the product links, I’ll receive a small commission at no extra cost to you. This helps support my blog, The Hungry Hiker and allows me to continue to create content for you free of charge. Thank you for your support!