A DIY Backpacking Food Cozy just might be one of the cheapest (and most used) pieces of backpacking gear you’ll have in your hiking and backpacking setup, especially if you do Ziplock Freezer Bag Cooking out on trail.
Using a Backpacking Food Cozy means you’re likely to use less fuel when cooking your backpacking meals AND will help your backpacking meals rehydrate faster and stay warmer when out on trail.
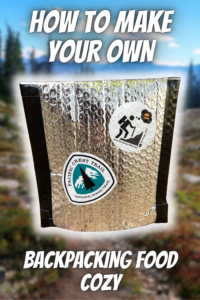
In this post, I’m going to show you how you can make your very own DIY Backpacking Food Cozy. This is a super easy and cheap backpacking DIY project you can do at home to help you prepare for your next car camping or backpacking adventure.
Okay, let’s make a backpacking food cozy!
The Materials You’ll Need:
Reflectix Foil Insulation OR a Car Windshield Sunshade Reflective Sun Visor – If you’re using a windshield sunshade, one sunshade can make up to 4 backpacking food cozies.
Velcro
Gorilla Tape – Duct tape would work too, but Gorilla tape is easier to work with and seems to last longer.
Sharpie
Scissors
Ruler
How To Make A Backpacking Meal Cozy
Create The Top Flap
Start by measuring the reflective material with the backpacking food bag you plan on using in your cozy. Use the edge with the fabric as part of the cozy’s top flap. Use one of your backpacking food bags as a guide, make sure you leave 2-3 inches from the top where the fabric is and then fold over. This will be the top flap of the cozy.
Measure The Length of Your Food Bag
Grab the ruler and measure the length of your backpacking food bag. The bag I used as a guide was 8 inches in length. I folded over the top of the bag because when I cook my meal on trail, this top portion of the bag will be torn off.
From the top flap fold, grab the ruler and measure the length of your backpacking food bag and mark the spot with a Sharpie. Use the ruler and measure the length of your backpacking food bag again, marking a second spot with the Sharpie. This will be the material for the back of the cozy.
Use the ruler and measure out three inches below the second Sharpie mark. Mark this spot. This will be the material for the bottom of the cozy. The third Sharpie mark will be the main cut point for the length of the cozy. From the top flap fold, you should have three Sharpie marks.
Measure The Width of Your Food Bag
Now you’ll want to measure the width of your backpacking food bag. The width of the food bag I’m using is about 8 inches. On the reflective material, use the ruler and measure out the width of your food bag. From each Sharpie mark on the material, measure out the width of your food bag and then give yourself an extra inch of width. Mark the width with the Sharpie from all three Sharpie marks from when you measured the length of the bag.
Trace and Cut Out The Material
On one side, draw a line using the ruler going down the length of the reflective material connecting all of the Sharpie marks. You can use the circles on the reflective material as a guide to help keep your line straight. Do this on the opposite side as well. Then, using the ruler, connect the bottom Sharpie marks (the width of the cozy) to each other.
Cut out the reflective material using your new Sharpie lines as your guide and double-check to make sure the cozy material fits your backpacking food bag.
Make The Bottom of The Backpacking Meal Cozy
Place your backpacking food bag on the reflective material, making sure that the top of the food bag is sitting just below the folded top flap of the cozy. Mark the bottom of the food bag with the Sharpie.
From this new Sharpie mark, measure out one inch moving down, mark the spot and then measure out another one inch moving down and then mark the spot. You will have a total of three lines.
Using the ruler, line up the ruler to the first bottom Sharpie mark, which was where the bottom of the food bag was and fold the cozy material up. Use the ruler so your fold is straight and press the palm of your hand on the reflective material to get a nice deep fold.
Open up the material and move the ruler down to the third Sharpie mark and fold the cozy material up. Use the ruler so that your fold is straight and press the palm of your hand on the reflective material to get a nice, deep fold.
Make The Accordion Fold For The Bottom of The Backpacking Meal Cozy
To make the accordion fold for the bottom of the cozy, first tear off a few pieces of Gorilla tape and put them to the side, having them ready.
Then, fold up the cozy material at the second Sharpie mark, bringing the material up towards you. Then fold up the back side of the cozy, which was the third Sharpie mark and the front side of the cozy, which was the first Sharpie mark.
Grab a piece of Gorilla tape and use it to crimp the bottom corner shut. Line up the tape and fold it over to the other side. Do the same thing on the other side. You can use some extra Gorilla tape to reinforce the bottom corners of the cozy if needed.
Tape Up The Sides of The Backpacking Meal Cozy
Now you’ll want to tape up both sides of the food cozy. Prep a couple longer pieces of Gorilla tape. Put half of the tape on one side and then flip the cozy over to stick the tape to the other side. Repeat this on the other side of the cozy.
Attach Velcro To The Top Flap of The Backpacking Meal Cozy
Then, you’ll want to add Velcro to the top flap of the cozy. Start by lining up both sides of the Velcro and bring them together. Once attached, cut the Velcro into three small pieces. Pull one sticky backside off of the Velcro and stick it to the inside of the top flap of the cozy and press down. Do this two more times.
Finally, pull the sticky backside off of the three Velcro pieces that are stuck on the inside top flap of the cozy. Fold the top flap over and press down with the palm of your hand. Slowly open up the top flap and WAH-LAA!! You’ll see the three Velcro pieces are on both sides.
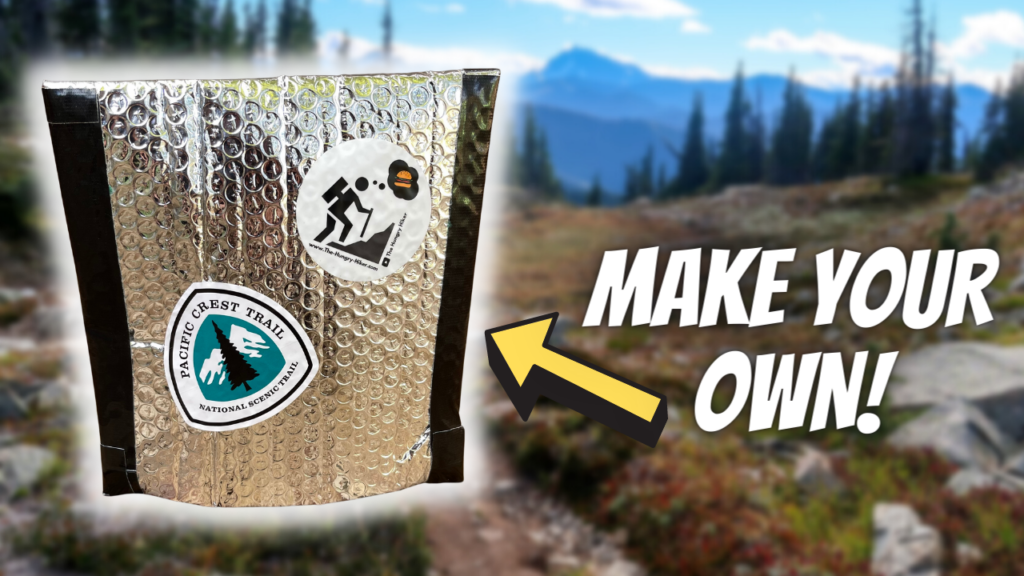
Now you have yourself a Backpacking Food Cozy!
Check out this video to watch how I make my Backpacking Food Cozy
Side Notes
If you want, you can use a few more pieces of Gorilla tape like I did and attach the tape to the rest of the edges of the cozy so that they’re all matching black, or whatever color of tape you decide to use.
Don’t forget to customize your Backpacking Food Cozy with a couple awesome stickers.
How Much Does The Backpacking Meal Cozy Weigh?
For those of you who are curious about how much this DIY Backpacking Food Cozy weighs, according to my food scale, it weighs 2.6 ounces.
Using a Backpacking Food Cozy means you’ll save on fuel when cooking your backpacking meals AND this will help your backpacking meals rehydrate faster and stay warmer when out on trail.
If you have any questions, leave them in the comments below.
DISCLAIMER: This post and video contain affiliate links, which means that if you click on one of the product links, I’ll receive a small commission at no extra cost to you. This helps support my blog, The Hungry Hiker and allows me to continue to create content for you free of charge. Thank you for your support!
Inspired? Pin It!
This was really helpful and very doable!!
Glad this was helpful!
Very helpful video! If you want to save some weight you can use Aluminum Foil Tape (what they actually use on HVAC ducts) instead of the heavier general “duct” tape. It does come in different thicknesses as well. That said, it may not be as flexible over time, but I have never used it outside of sealing my ducts in my basement. I have a lot of left over cold food bags I saved from Whole Food deliveries during the pandemic so when I make my cozy I will make it with the metal tape and see how it works. Great thing about the delivery bags is that the bottom is already gusseted.
That’s a great idea!
Really helpful information on your site. Your experience shows in your details. Thanks.
Thank you!
I followed these instructions and made a good cozy from a car window screen. Thank you!!
Glad this one was helpful!
This was exactly the guide I was looking for! In Canada we can’t really buy these anywhere. I made 3 using an old car sun shield. Bring on winter camping !!
Awesome! Glad this was helpful!
I love this idea! I’ve seen you-tubers use their fleece or down jacket to keep their food warm while it rehydrates, but that means they can’t wear their cloths while prepping food, and then their fleece hoodie smells like dinner – not ideal in bear country.
And as a bonus I bet you can use the cozy to hold your meal bag while pouring in hot water without scorching your poor fingers yet again.