The thought of dehydrating my own backpacking food used to intimidate me. I was so overwhelmed with options on what I could dehydrate that I didn’t know where to start with backpacking recipes. It wasn’t until after I had followed a recipe or two that I realized I could take the meals I cook at home, throw them in the dehydrator and turn them into delicious backpacking meals to enjoy out on trail.
Cue in my White Bean & Sausage Soup backpacking recipe. This used to be a recipe I only made and enjoyed at home in my own kitchen. Then one day, I decided to get creative and put some of my leftovers from this recipe into my food dehydrator. It turned out being a complete success and is now one of my most favorite meals to eat when I go backpacking.
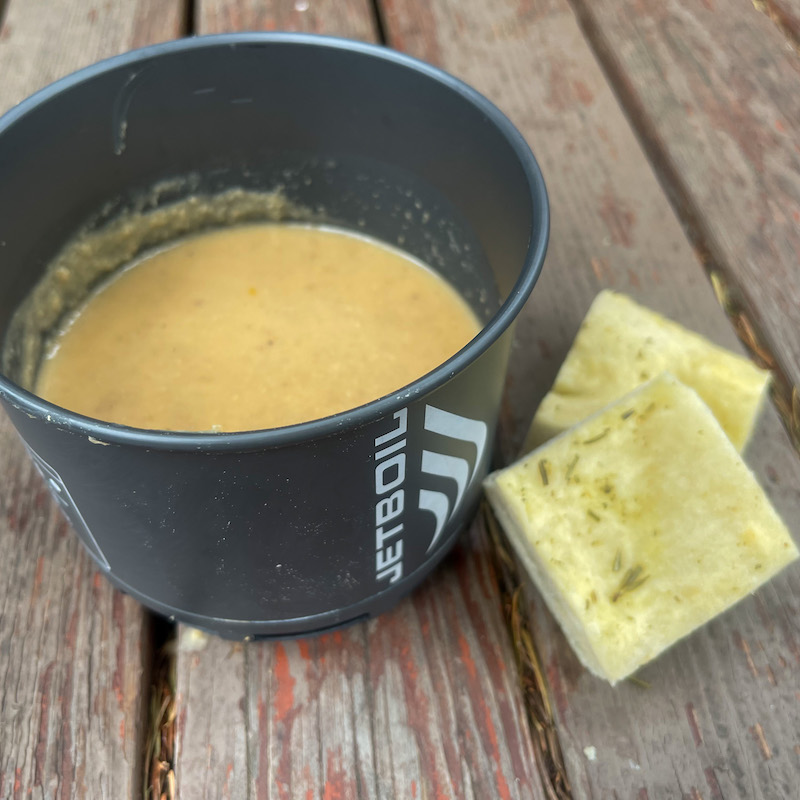
The White Bean & Sausage soup recipe is a simple, easy-to-make, hearty, flavorful soup that doesn’t use a ton of ingredients and can be easily turned into a fast cooking, delicious backpacking meal. It’s also dairy-free! If you want to bump up the calorie intake on this one, pack out some focaccia bread to both dip into the soup and clean your pot out with at the end of your meal. Follow along below to not only see how to make the soup, but also see the steps I took in dehydrating and then rehydrating the soup out on trail.
The key to make sure this recipe rehydrates on trail fast and easy, while using the least amount of fuel as possible, is to blend the dehydrated soup in a food processor before putting it in a food storage bag or container.
Pro Tip: You can easily rehydrate this soup while backpacking either by cooking it directly in a pot or cooking it in a Ziplock freezer bag. I’ll include steps for both options below.
White Bean & Sausage Soup Recipe
Ingredients
4 – 15.5 ounce cans of white beans, drained
3-4 cloves of roasted garlic
2 tbsp of olive oil
1 large onion, chopped
1 lb of spicy (or mild) Italian Sausage
2 cups (packed) fresh baby spinach
Kosher salt & freshly ground black pepper
8 cups of low-sodium chicken broth
Food Processor
Food Dehydrator
Parchment Paper or Non-Stick, Reusable Teflon Sheets
Cooking Instructions
- Roast the garlic
- Rub olive oil on garlic and wrap with foil
- Cook garlic for 30 minutes at 500 degrees
- Add 1 can of beans to food processor
- Blending one can at a time, add a splash of chicken broth as you blend
- Heat the olive oil in a large pot over medium high heat
- Add chopped onion to the pot
- Cook until onions are tender, about 5 minutes
- Stir in roasted garlic cloves and cook for 30 seconds
- Season with a pinch of salt and pepper
- Brown sausage, breaking it into bite-size chunks as it cooks 8-10 minutes
- Add sausage/garlic/onion mixture to the beans in the food processor
- Pour in 1 cup of chicken broth
- Blend until creamy
- Return the beans and sausage to the pot
- Pour in chicken broth until the soup is a desired consistency
- Bring to a boil
- Reduce to a low simmer and cook, uncovered for 20 minutes. Soup will thicken up slightly.
- Stir in spinach and let wilt for 1-2 minutes
- Taste and season with salt and pepper
- Let cool before starting the dehydration process
Dehydrating Instructions
- Prep food dehydrator by lining each tray with parchment paper or Non-Stick, Reusable Teflon sheets
- Spread soup in a thin layer on each tray
- One serving = 2 cups; one serving = one tray in the dehydrator
- Turn in dehydrator to medium (135 degrees)
- Rotate trays one an hour to ensure that each tray gets dehydrated evenly
- Dehydrate for 8-10 hours, or until soup is fully dehydrated
- Once dehydrated, remove each tray and allow to cool completely
- Break up each tray of soup, add to food processor and blend until it’s a fine powder
- Add blended soup into a storage bag/container or vacuumed sealed bag
- Store in a sealed bag/container in a cool, dry place
- Shelf life for soup is anywhere from 6 months to 1 year, depending on how it’s stored
Rehydrating in the Backcountry
Cooking in a Pot
- Boil 1 cup of water in a backcountry stove
- Add soup to water
- Stir soup and water until combined
- Cover and remove from heat
- Let sit covered in pot for 5-10 minutes
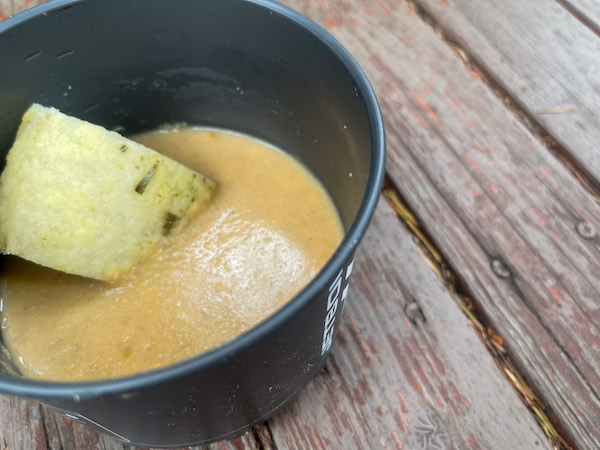
- Serve with bread (I love this one with focaccia bread.) You can also use the bread to wipe the sides of the pot clean when finished eating the soup.
Cooking in a Ziplock Freezer Bag
- Boil 1 cup of water in a backcountry stove
- Add water into soup in a Ziplock Freezer Bag (Quart Size)
- Stir soup and water together
- Seal bag and let sit in a DIY meal cozy or something equivalent for 5-10 minutes
- Serve with bread (I love this one with focaccia bread.) Use the Ziplock bag as a trash bag after enjoying your meal.
Serving Size: 1 cup
Recipe Makes 5 Servings
Calories Per Serving: 843
Calorie Density Per Serving: 3.71
White Bean & Sausage Soup | Dehydrated Backpacking Food Recipe
Learn how to make your own backpacking meals with some of my favorite recipes:
Gluten Free, Keto Bread
Cheap & Easy One Pot Thanksgiving Dinner
Holy Molé Breakfast Bars
Coconut Cashew Curry with Couscous
Dehydrated Pasta Penne Alfredo
Dehydrated Backcountry Spaghetti
Sweet & Spicy Homemade Trail Mix
DISCLAIMER: This post and video contain affiliate links, which means that if you click on one of the product links, I’ll receive a small commission at no extra cost to you. This helps support my blog, The Hungry Hiker and allows me to continue to create content for you free of charge. Thank you for your support!
Inspired? Pin It!
1 Comment on Backpacking Recipe: White Bean & Sausage Soup